Bulding an AI pin

Lets do an end to end project where we build an AI-pin to talk to a multi-modal language model.
The system consists of two parts:
- Device: A low-power network device with camera, speaker and microphone
- Desktop: A central machine hosting the LLM, possibly a desktop computer running geniusrise
We start with a ESP32 based platform as there are many these days. Lets look at two of them:
TTGO
The TTGO T-Camera Plus is a unique ESP32 module featuring a built-in camera and display. It's designed for applications that require direct image capture and display capabilities without the need for external screens or cameras.
- CPU: Dual-core Tensilica LX6 microprocessor up to 240 MHz
- Memory: 520 KB SRAM, 4 MB PSRAM
- Connectivity: Wi-Fi (802.11 b/g/n), Bluetooth (Classic and BLE)
- Camera: OV2640 camera module, 2 Megapixels
- Display: 1.3-inch OLED display
- Extras: Fish-eye lens, optional MPU6050 module for motion sensing

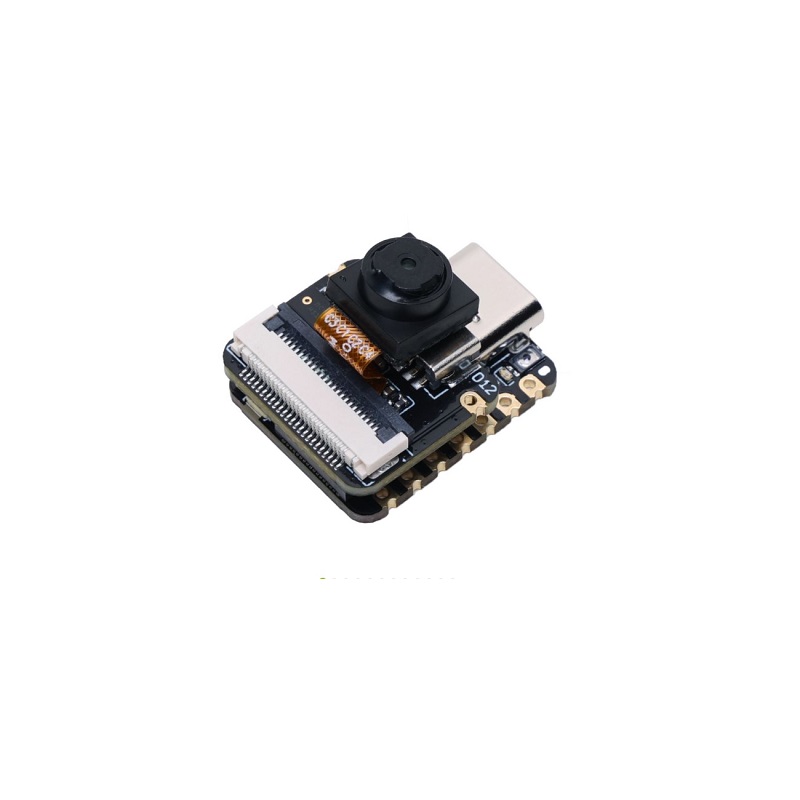
Seeed Studio XIAO
Seeed Studio XIAO ESP32C3 is a mini but powerful module. It's part of the Seeed Studio XIAO series, known for its compact design and reliability in various IoT projects.
- CPU: RISC-V single-core processor, up to 160 MHz
- Memory: 400 KB SRAM, 4 MB Flash
- Connectivity: Wi-Fi (802.11 b/g/n), Bluetooth 5 (LE)
- I/O Pins: Rich set of peripherals including GPIOs, UART, SPI, I2C, and more.
- Size: Ultra-small form factor suitable for wearable devices and compact projects
Peripherals
We used a bunch of these peripherals wherever the boards did not have them. We usually chose a platform with at least a screen and a camera included and added these peripherals to them.
Microphone
- Model: INMP441 I2S
- Features: High precision, omnidirectional, MEMS microphone module, Digital I2S interface
- Usage: Ideal for high-quality audio input and voice command projects

Speaker
- Model: SeeedStudio Grove Speaker
- Features: Programmable, with built-in amplifier, capable of playing various tones and sounds
- Usage: Suitable for projects requiring audio output like alarms, voice notifications, and music playback

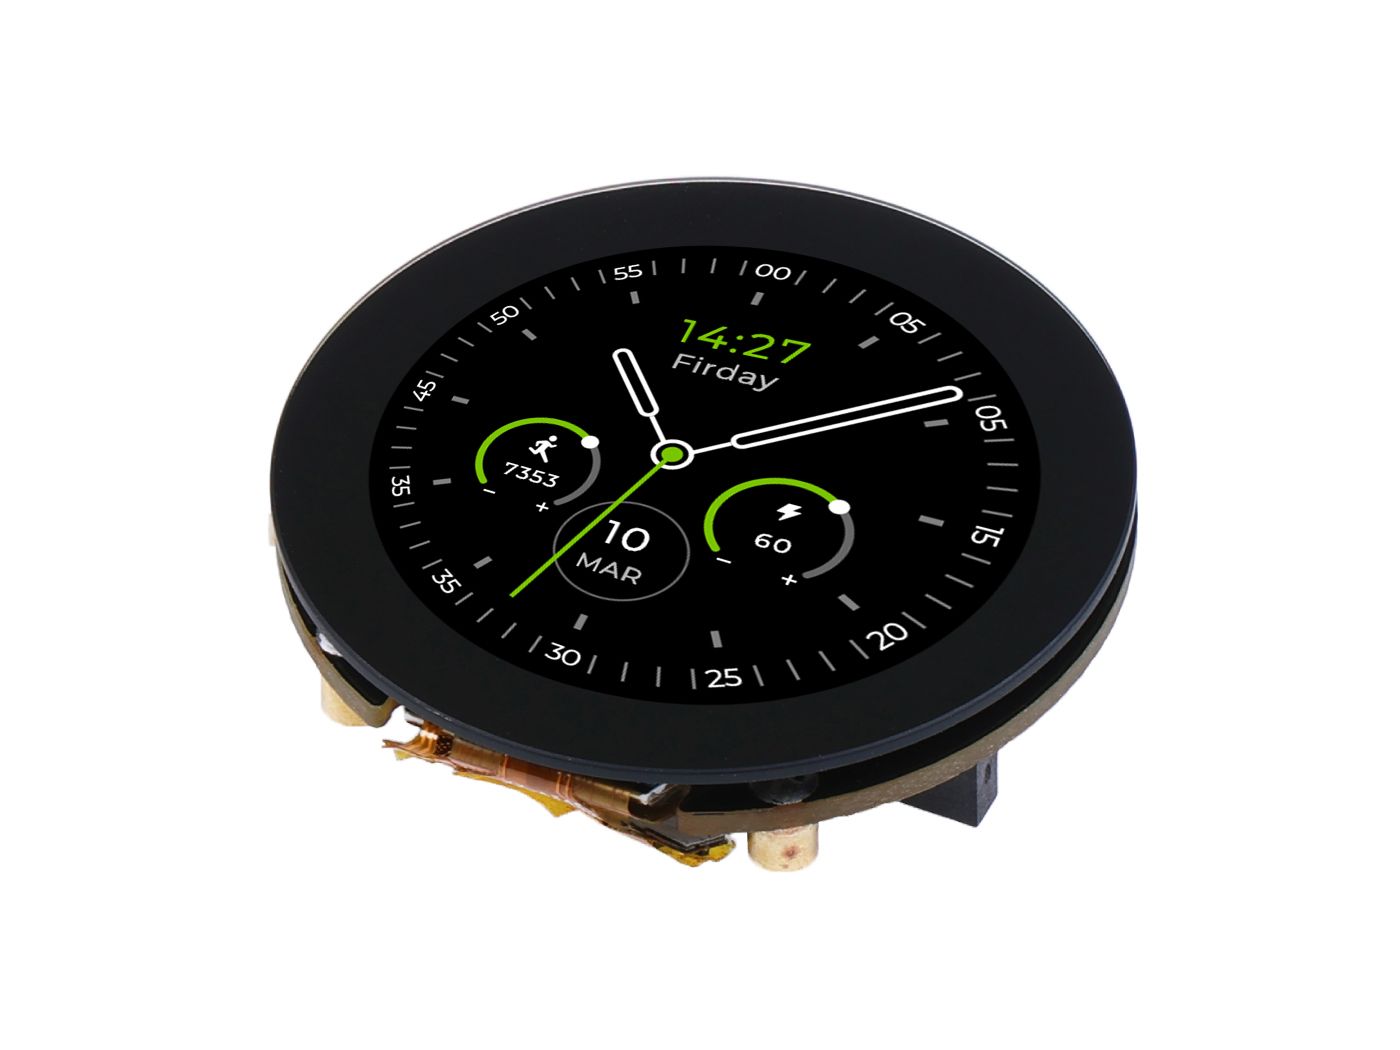
Touchscreen
- Model: SeeedStudio Round Display for XIAO
- Features: Touchscreen capability, round display, perfect for user interface projects
- Usage: Excellent for compact and wearable devices requiring user interaction
Connections
Now lets get connected. The following lists all connections, some soldering of headers may be required.
Seeed Studio XIAO Connections
For the Seeed Studio XIAO, we'll connect a touchscreen display, an INMP441 I2S microphone, and a SeeedStudio Grove Speaker.
Touchscreen Display
- Display Model: Seeed Studio Round Display for XIAO
- Connection Type: SPI
- Required Pins:
- SCL (Serial Clock) to XIAO's SCL (GPIO18 for SPI clock)
- SDA (Serial Data) to XIAO's SDA (GPIO19 for SPI MOSI)
- RES (Reset) to any available GPIO pin (e.g., GPIO21) for display reset
- DC (Data/Command) to any available GPIO pin (e.g., GPIO22) for data/command selection
- CS (Chip Select) to any available GPIO pin (e.g., GPIO5) for SPI chip select
Very easy to connect, xiao sits on the display.
Microphone (INMP441 I2S)
- Connection Type: I2S
- Required Pins:
- WS (Word Select/LRCLK) to GPIO23
- SCK (Serial Clock) to GPIO18
- SD (Serial Data) to GPIO19
Speaker (SeeedStudio Grove)
- Connection Type: Digital I/O
- Required Pins:
- SIG to any PWM-capable GPIO pin (e.g., GPIO25) for audio signal
- GND to GND
TTGO T-Camera Plus Connections
For the TTGO T-Camera Plus, we're connecting an INMP441 I2S microphone and a SeeedStudio Grove Speaker since it already includes a camera and display.
Microphone (INMP441 I2S)
- Connection Type: I2S
- Required Pins:
- WS (Word Select/LRCLK) to GPIO32
- SCK (Serial Clock) to GPIO14
- SD (Serial Data) to GPIO27
Speaker (SeeedStudio Grove)
- Connection Type: Digital I/O
- Required Pins:
- SIG to any PWM-capable GPIO pin (e.g., GPIO33) for audio signal
- GND to GND
General Tips
- Power Supply: Ensure that all devices are powered appropriately. The XIAO and TTGO can be powered via USB or an external 3.3V power supply.
- Common Ground: Make sure all components share a common ground connection.
- Programming: Use the Arduino IDE or ESP-IDF for programming the ESP32 devices. Libraries specific to the peripherals (e.g., display, I2S microphone, and speaker) will be required.
- I2S Library: For the INMP441 microphone, an I2S library suitable for ESP32 should be used to handle audio input.
- Display Library: For the touchscreen display, a library compatible with the specific model will be needed for interfacing and graphics rendering.